Inserting a calendar
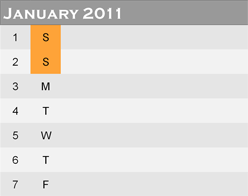
The Calendar Wizard helps you design month-at-a-glance calendars for use in your publication.

The calendar is created as a scalable text-based table so you can edit text using the standard text tools. The properties of a selected calendar are similar to those of a table, and can be modified identically (see Manipulating tables). Like custom table formats you can create your own custom calendar formats.
The wizard lets you set up the month/year and calendar style/format, and controls the inclusion of personal events and/or public holidays. The Calendar Event Manager lets you add personal events before or after adding a calendar to the page.
For calendar-specific properties, a context toolbar lets you change an existing calendar’s month/year, modify calendar-specific properties, and manage calendar events (both personal and public holidays).
At any time, you can update calendar details throughout your publication via Set User Details—in the same way that you’d set up the date (along with the time) on some alarm clocks. This is especially useful if you want to update the year on a year-to-view page, composed of 12 monthly calendars—you only need to change the year in one place.
-
If you have adopted a calendar-based design template, you’ll be initially prompted to configure global calendar details via a User Details dialog. This updates all calendar details throughout your PagePlus document.
To insert a calendar:
-
Click the Table flyout on the Tools toolbar and choose
 Insert Calendar.
-
Click again on your page, or drag out to set the desired size of the calendar.
-
From the displayed Calendar Wizard, define options for your calendar including setting the year and month, calendar style (square, or in single or double column format), week start day, room to write, display options, switching on personal events/holidays, and calendar format.
To have your country’s public holidays shown, check Add public holidays in the wizard and select a Region from the associated drop-down menu. To add personal events, check Add personal events additionally.
-
Click Finish to complete the wizard.
To set up your calendar (using calendar design template):
-
Open a calendar design template from the Startup Wizard’s Use Design Template option (See Creating a publication from a design template).
-
In the displayed User Details dialog (Calendars tab), enter a Year that your calendar will be for.
-
In the Events section, check Show public holidays and/or Show personal events if your template’s calendar is to adopt the holidays and events already configured in the Calendar Event Manager (to modify personal events, click the Events button).
-
Click the Update button.
If you plan to use your calendar in subsequent years, simply update the Year setting in Tools>Set User Details.
To view and edit a selected calendar’s properties:
-
Click
 Edit Calendar on the Calendar context toolbar.
– or -
Right-click on a selected calendar, and choose Calendar>Edit Calendar…. -
Choose an appropriate tab and make your modification, then press OK.
Right-click on a row/column header within the calendar to select, insert, delete, and adjust widths/heights for rows (or columns), as well as autofit to cell contents, but take care not to corrupt your table formatting!
Adding public holidays
When you create a calendar you can set up the appropriate public holidays for the country you reside in. The holidays will show up in your calendar automatically if Add public holidays is checked in Calendar Properties.
To enable public holidays:
-
Select your calendar’s bounding box, and click
 Edit Calendar on the context toolbar.
-
From the Events tab, check Add public holidays.
-
(Optional) Swap to a different country’s public holiday settings by using the Region drop-down list.
-
Click OK.
To display public holidays:
-
Select your calendar’s bounding box.
-
Click
 Calendar Events on the context toolbar.
– or -
Select the Calendar Event Manager from the Tools menu. -
Enable the Show public holidays option.
Adding personal events
You can complement your public holiday listing
s (e.g., Easter holidays) by adding personal events such as birthdays, anniversaries, and bill payments (unfortunately!) so that the events show up on your calendar—simply use the Calendar Events button on a selected calendar’s context toolbar. Events show automatically on your calendar under the chosen date.

To add an event:
-
Select your calendar’s bounding box.
-
Click
 Calendar Events on the context toolbar.
– or -
Select the Calendar Event Manager from the Tools menu. -
Ensure that the Show personal events option is selected.
-
(Optional) Select Show events by date to view your events in a more traditional calendar layout.
-
Click
 New event.
-
From the dialog, type, use the up/down arrows, or click the
 Browse button to select a date.
-
Enter your event text into the text input box. This displays in your calendar under the chosen date.
-
If the event is a birthday or other annual event, check Event recurs annually.
-
Click OK. The event appears in the event list under the chosen date.
-
When you have finished adding events, click Save.
-
Use the
 Edit event or
  Delete event buttons to modify or delete an existing event.
-
You may wish to transfer your PagePlus X4 custom settings to your new version of PagePlus. See Importing PagePlus X4 settings.