Setting guides
Layout guides are visual guide lines that help you position layout elements. They can include page margins, row and column guides, bleed area guides, and ruler guides.
|
|
Page margin settings are fundamental to your layout, and usually are among the first choices you’ll make after starting a publication from scratch. The page margins are shown as a blue box which is actually four guide lines—for top, bottom, left, and right—indicating the underlying page margin settings. If you like, you can set the margins to match your current printer settings. |
|
|
You also have the option of setting up row and column guides as an underlying layout aid. PagePlus represents rows and columns on the page area with dashed blue guide lines. Unlike the dashed gray frame margins and columns, row and column guides don’t control where frame text flows. Rather, they serve as visual aids that help you match the frame layout to the desired column layout. |
|
|
Bleed area guides assist you in positioning “bleed” elements that you want to run to the edge of a trimmed page. To allow for inaccuracies in the trimming process in professional printing, it’s a good idea to extend these elements beyond the “trim edge”—the dimensions defined by your Page Setup. With bleed guides switched on, the page border expands by a distance you specify, and the trim edge is shown with dashed lines and little “scissors” symbols. Note that these guide lines are just a visual aid; only the Bleed limit setting in the Publish as PDF or Print dialog extends the actual output page size. |
|
|
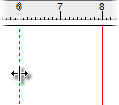
Ruler guides are free-floating red lines that you set by clicking and dragging from the rulers. They are “sticky” so that objects can snap to them, then be moved collectively with guide movement. |
Defining layout guides
To define layout guides:
-
Click
 Layout Guides on the Page context toolbar, Layout Guides… from the File menu, or right-click on a blank part of the page and choose Layout Guides. Then in the Layout Guides dialog, use the Margins tab to set guide lines for page margins, rows and columns, and bleed areas.
-
In the Margin Guides section, you can set the left, right, top, and bottom page margins individually, or click the From Printer button to derive the page margin settings from the current printer settings. The dialog also provides options for Balanced margins (left matching right, top matching bottom) or for Mirrored margins on facing pages where the “left” margin setting becomes the “inside,” and the “right” margin becomes the “outside.”
-
Remember to set up your margins so that you leave enough room for any intended header or footer.
-
Use the Row and Column Guides section to define guides for rows and columns. If you want rows or columns of uneven width, first place them at fixed intervals, then drag to reposition them as required.
-
Use Bleed area guides to specify the extra margin you want to allow around the original Page Setup dimensions or “trim area.” Note that if the setting is zero or you have View>Bleed Area Guides unchecked, you won’t see the bleed area displayed.
-
For ruler guides, use the Guides tab to precisely create, edit or delete ruler guides, or more commonly, just drag the guides from the rulers.
To show or hide guides:
-
On the View menu, check or uncheck a guide option.
Creating ruler guides
PagePlus lets you to set up horizontal and vertical ruler guides—non-printing lines you can use to align headlines, pictures, and other layout elements.

Guides are by default “sticky” so that stuck objects can be dragged around the page by their ruler guide—a great way to move previously aligned objects in bulk and simultaneously.
-
To create a ruler guide, click on a ruler, hold down your mouse button, then drag onto your page. A ruler guide line appears parallel to the ruler (Alt-drag to create the guide at 90 degrees to the ruler).
-
To move a guide, drag it.
-
To remove a guide, drag and drop it anywhere outside the page area.
-
To lock ruler guides, on the Tools menu, click Options… and select the Layout menu option, then check Lock guide lines.
-
To send guides to the back (for clearer object editing), on the Tools menu, click Options…, select the Layout menu option, then check the Guide lines to back option.
-
By default, guides are red but you can swap to any other color via Tools>Options>Layout—simply pick a new Guide Color. By checking Use Layer Color from the same location your guides can instead adopt the currently selected layer’s color. Switching off the layer in the Layers tab will hide the guides for that layer.
-
For precise ruler guide placement, check Ruler marks in Tools>Options>Layout to snap guides to ruler marks.
-
To unstick a selected object, click one of two small red triangular markers shown at the point where the object is attached to the guide. You’ll see a link cursor (
 ) as you hover over the sticky guide marker.
|
|
|
|
Click red marker to make non-sticky. |
Markers become non-sticky and change to black; object and guide are unstuck and either can then be moved. |
-
To turn sticky guides on and off, check/uncheck Sticky Guides from the Arrange menu (or the equivalent from Tools>Options>Layout). Previously stuck objects will remain sticky even after sticky guides are switched off—you’ll have to make them non-sticky manually.


